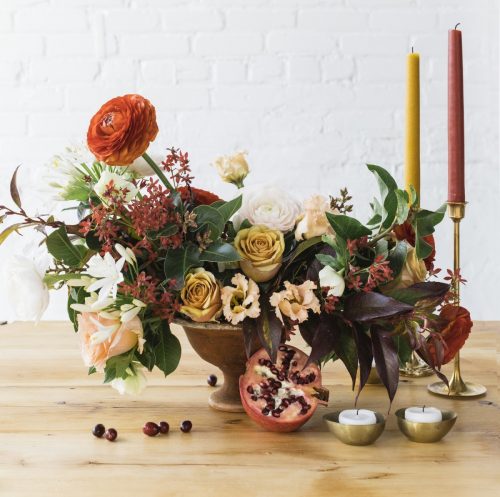
My inspiration for this design was the changing of the seasons. I think this is a transitional arrangement—we’ve just left fall and are getting ready for the holidays. It’s also time for entertaining, so I created a long tablescape by making three arrangements and grouping them together with other elements on the table. I used a mix of complementary tones like rust, cranberry, white, and blush to create a new interpretation of the traditional holiday color scheme. Incorporating many different flowers of various textures makes it more reminiscent of nature. I also wanted it to feel light and feminine since this was created for a dessert party with friends, so I added brass, fruit, and white ceramic bud vases to give it a cheerful feel.
— Kaylyn Hewitt, owner and creative director at True Vine Studio

Kaylyn Hewitt
How to Make the Holiday Table Centerpiece
 MATERIALS:
- chicken wire
- floral tape
- three complementary containers
- sumac foliage
- leucothoe branches
- Christmas bush hellebore
- ‘Amnesia’ garden roses
- pink garden roses
- Allium canadense
- lisianthus
- ranunculus
 1 | Start with the largest of the three arrangements. It will be in the center and set the tone for the other smaller arrangements. Mold the chicken wire into a ball and place it in the bottom of your container. Then take a piece of floral tape and stretch it across the middle of the container.
 2 | Cut the leucothoe branches short and create a V shape to get a good base, keeping one side higher than the other. I like leucothoe foliage because of the shape and distribution of the leaves on the stem. Start working from the outside of the container and work inward, creating a line down the middle of the container. Next add sumac branches to the leucothoe lines. They have a great color variation; their darker foliage and depth of color add a lot to the arrangement.
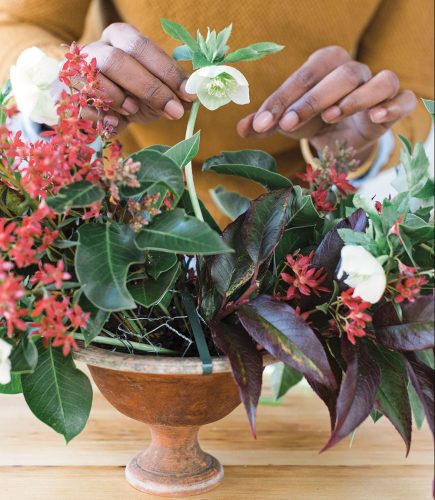 3 | Tuck sprigs of Christmas bush into the greenery, but insert them at different heights and keep to the V line. The small pops of pink work well against the darker-colored leaves. Now it’s time for one of my favorite flowers: hellebores. They’re so versatile—they have great foliage, and I enjoy their lighter color and delicate heads, which give the arrangement a breath of fresh air. When placing, add them sparsely at different lengths throughout the design.
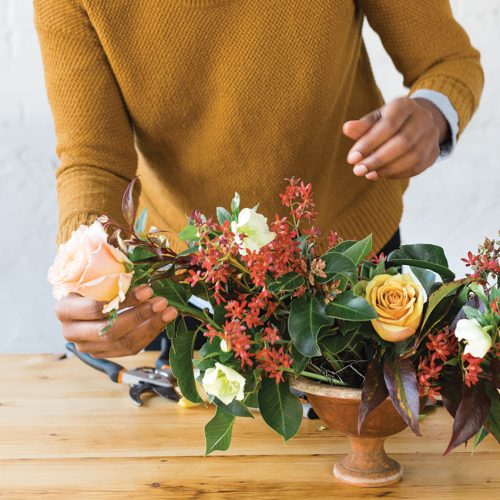 4 | Select roses in varying shades (I chose ‘Amnesia’ and a blush). Open up the roses, and remove the leaves and any brown guard petals. I alternate the colors as I go along, nestling the roses deep in the foliage and in the center of the arrangement to anchor it. Because roses have more compact petals, they can be tucked in between other materials more easily, and they tend to look heavier and should be placed lower. At this point, most of the wire should be covered.
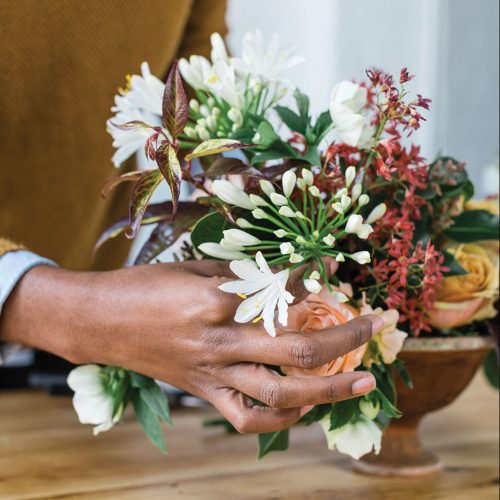 5 | Add only a few stems of allium to the taller side of the arrangement and up high to create interest. I don’t want to squish them among the other flowers because of their airy nature—they look like bursts when placed at the top of the arrangement.
 6 | Separate the lisianthus flowers from the buds, and use the blooms to fill in any visual holes. I like that their yellow-and-black centers mimic the rest of the undertones in the arrangement. Normally I might add in the buds at the end as an extra floating element, but I won’t this time because the blooms are lovely on their own and there’s already a similar green shade with the hellebores.
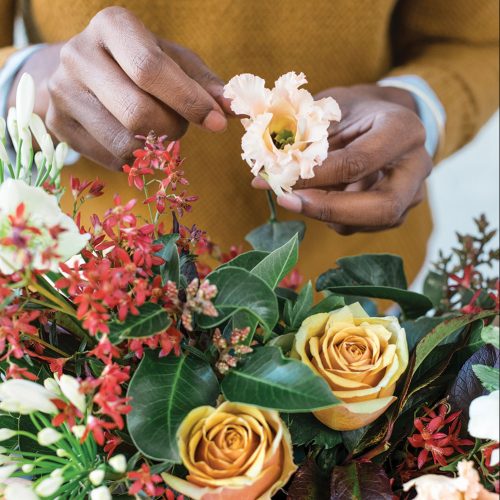
 7 | Finish the arrangement with the red and white ranunculus. Because of this flower’s tough stems, I like to have one of them high to draw your eye upward. Fill in any additional holes, placing them throughout the arrangement. When done, feel free to add in more sprigs of Christmas bush or greenery to really make it the showstopper.
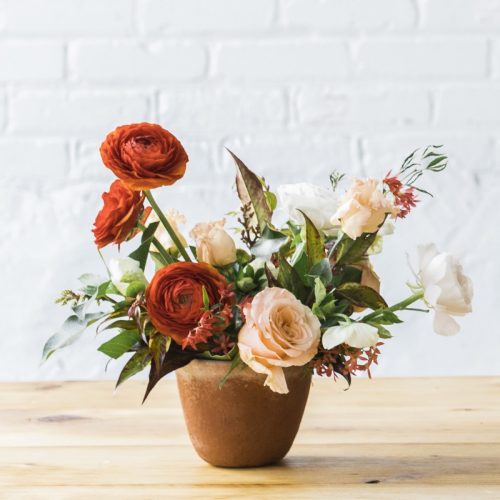 Now create your two smaller arrangements using roughly the same steps and materials. I varied them some and made them a bit more vertical so that the flowers don’t creep over into the place settings. It’s just right for a Thanksgiving or Christmas table!
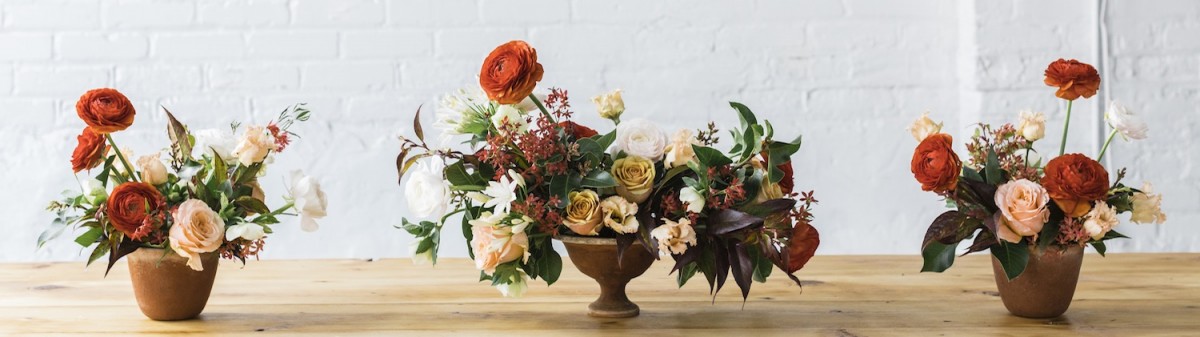
See more of Kaylyn Hewitt’s work at True Vine Studio.
By Kaylyn Hewitt | Produced by Jena Hippensteel | Photography by Joyelle West
More Step-by-Step Floral Centerpieces
- Summer Centerpiece in Hot Pink and Green
- Desert Inspired Centerpiece
- Natural Tulip Centerpiece
- Adri Smith’s Autumn Palette