“My inspiration for this tulip centerpiece grew from my constant wish for spring during the winter months. In Chicago, we’re telling each other, ‘Oh, I can’t wait for spring to come!’ And one of the first signs that winter is almost over is seeing the planted tulips all down Michigan Avenue start to pop up out of their carpet of snow. Oh, it’s Heaven! This centerpiece is a real conversation starter. It’s a lot of fun to make and really quite easy once you know how. Create it on your kitchen counter, and move it (carefully) to your dining room table later for display. The tulips are readily available in many wonderful colors, and the whimsy of it is very appealing!”
 Materials:
- tulips
- sheets of green moss
- lichen branches
- synthetic snow (optional)
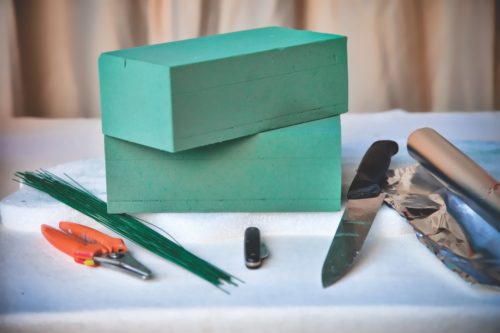
Tools & Supplies
- floral snips
- floral wire
- pocketknife
- kitchen knife
- aluminum floral foam
- soaked Oasis
- Styrofoam board
- straight pins

1| Using a kitchen knife, cut the Styrofoam board into an amoebic shape. This step is important because it’s the base of the whole arrangement, so size it to the table. (Using a pen first to mark your preferred outline helps determine where to cut.)

2| Place a sheet of aluminum foil on top of the Styrofoam board.

3 | Following the amoebic shape of the Styrofoam board, mold the foil into the shape of a low pan with about a half-inch lip on it. This aluminum “pan” will hold the wet floral foam, and the half-inch lip is to catch any runaway drip from leaking out onto the table.

4| Place the pre-soaked bricks of floral foam onto the aluminum “pan,” and start sculpting the little garden plot with a kitchen knife. (Just a tip: Let the wet floral foam sit in an empty sink for a few minutes to get rid of extra moisture.)
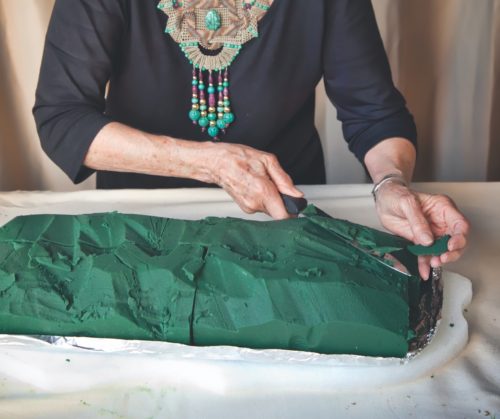
5| While sculpting the floral foam, be sure to taper it off at the edges so it has a natural, mounded look.

6| Take the sheets of green moss and lay them on top of the floral foam mound.

7| Since the moss comes in random sheets, be sure to work them all together. Overlap some and run them off the Styrofoam board onto the table in a haphazard, natural looking way.

8| Now the fun part starts. Take the lichen branches (to give it a woodsy feel), and lay them artistically over the mound. You may have to break one in half to make it look right.

9| Take a straight pin and prick each tulip through the stem just beneath its bloom. This will keep the petals from opening up any further.
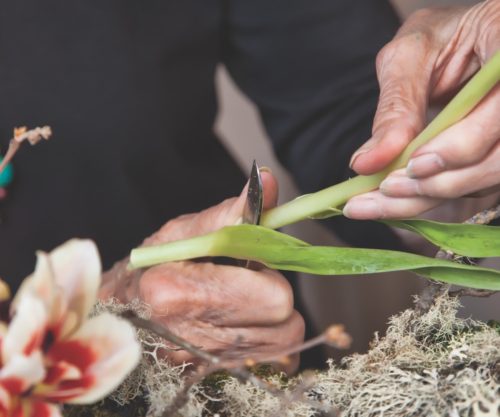
10| Cut each stem at an angle with a sharp knife or floral snips. This will make the tulips last longer and make them easier to insert into the arrangement.

11| In case you have a droopy tulip, you can wire it around the stem from top to bottom. (But keep in mind this isn’t always necessary.)
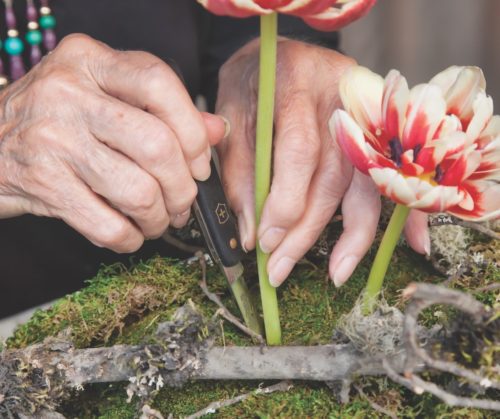
12| With a pocketknife, or even a pencil, make a small hole through the moss and into the floral foam. Then insert the tulip. (Don’t push the tulip all the way through to the foil, because you want the tip of the stem to be surrounded by wet floral foam.) I grouped my tulips in clusters, but feel free to be imaginative and please your own eye.

MORE TULIPS AND SPRING ARRANGEMENTS
- Learn all about tulips and how to make beautiful tulip arrangements from tastemakers in the floral, event, garden and interiors world.
- For the Love of Narcissus– These blooms are a favorite harbinger of spring and, with their cheerful faces, become total show-offs.
- Tulipomaniaand how history’s wildly coveted tulip found its way to today’s gardens.
- Our Favorite Tulip Arrangements – This collection inspires with cheerful bunches of single-color tulips, glorious combinations of tulips and other spring blossoms and fantastic centerpieces.
Photography by Eric Hausman

