See step-by-step instructions for the Air Plant Wreath.
Editor’s Note: While Hilton Carter created this project with spring and summer in mind, we love the muted colors for the warm days of early fall.
‘Tis the season to make a wreath! OK, well not your traditional wreath. For the most part wreaths have only been displayed during the fall and winter seasons as a religious ornament and, if you go way back, as a symbol for victory in the days of the Roman Empire. Over the last few decades, I believe wreath design has moved into an area that’s more about giving your front door or the space above your mantle a little extra flair. When I was a kid, my mother and I lived in small apartments and never really felt it necessary to place a wreath on the door, but now that I’m older, I see the wreath as being as important as the welcome mat that sits below your door. A really nice wreath on the front of your home is like a beautiful bow on a gift, a pearl necklace caressing a neck, or the perfect planter in which to present your favorite plant. I knew I’d find a way to tie this back to plants!

Wild Creations by Hilton Carter (CICO Books, 2021)
And speaking of plants, while most wreaths have mainly been constructed with live florals that will die over time or dried florals that remain intact, not many were made with living plants that would remain alive while hanging in or on the home. I mean, it makes sense. How would you attach the planter, holding the soil and roots of your plant, to the wreath? I would assume that would be difficult, not to mention unsightly, especially for something that is supposed to be about style. So in trying to become more of a wreath family, my wife challenged me to create a wreath that we could hang on our door or above our mantle during the warmer months of the year. Not sure if you know this about me or not but I kind of have a thing for houseplants. So I thought, this is the perfect opportunity to bring in more greenery in a way that was artfully done and not have my wife yell at me for bringing in even more plants. Yeah, I told you I was a plant hoarder.

From Wild Creations: Inspiring Projects to Create Plus Plant Care Tips & Styling Ideas for Your Own Wild Interior By Hilton Carter Published by CICO Books, 2021 Photographs by Hilton Carter © CICO Books, 2021
With the spring and summer in mind, and wanting to make a wreath with plants that could continue to live while adorning it, I thought there’s no better family of plants than air plants (Tillandsia). Air plants are so great for tucking into smaller spots in your home that you’re looking to freshen up with a little life. And given that they don’t grow in soil, are fairly lightweight, and love humidity, they make the perfect main feature for a spring/summer wreath. Of course, like all of your houseplants, you’ll want to make sure you are still able to provide them with the proper care, so please consider the light and humidity in the area of the home where you want to place them first. I live in an area that is very humid during the warm months of the year, so if I placed my air plant wreath on my front door, I wouldn’t have to water or mist it as much. But this isn’t the same for every home in every climate. So, if you’re looking to dress up your front door or mantle during the spring and summer, here are my tips for creating the perfect air plant wreath.
THE AIR PLANT WREATH
Project time: 1 hour
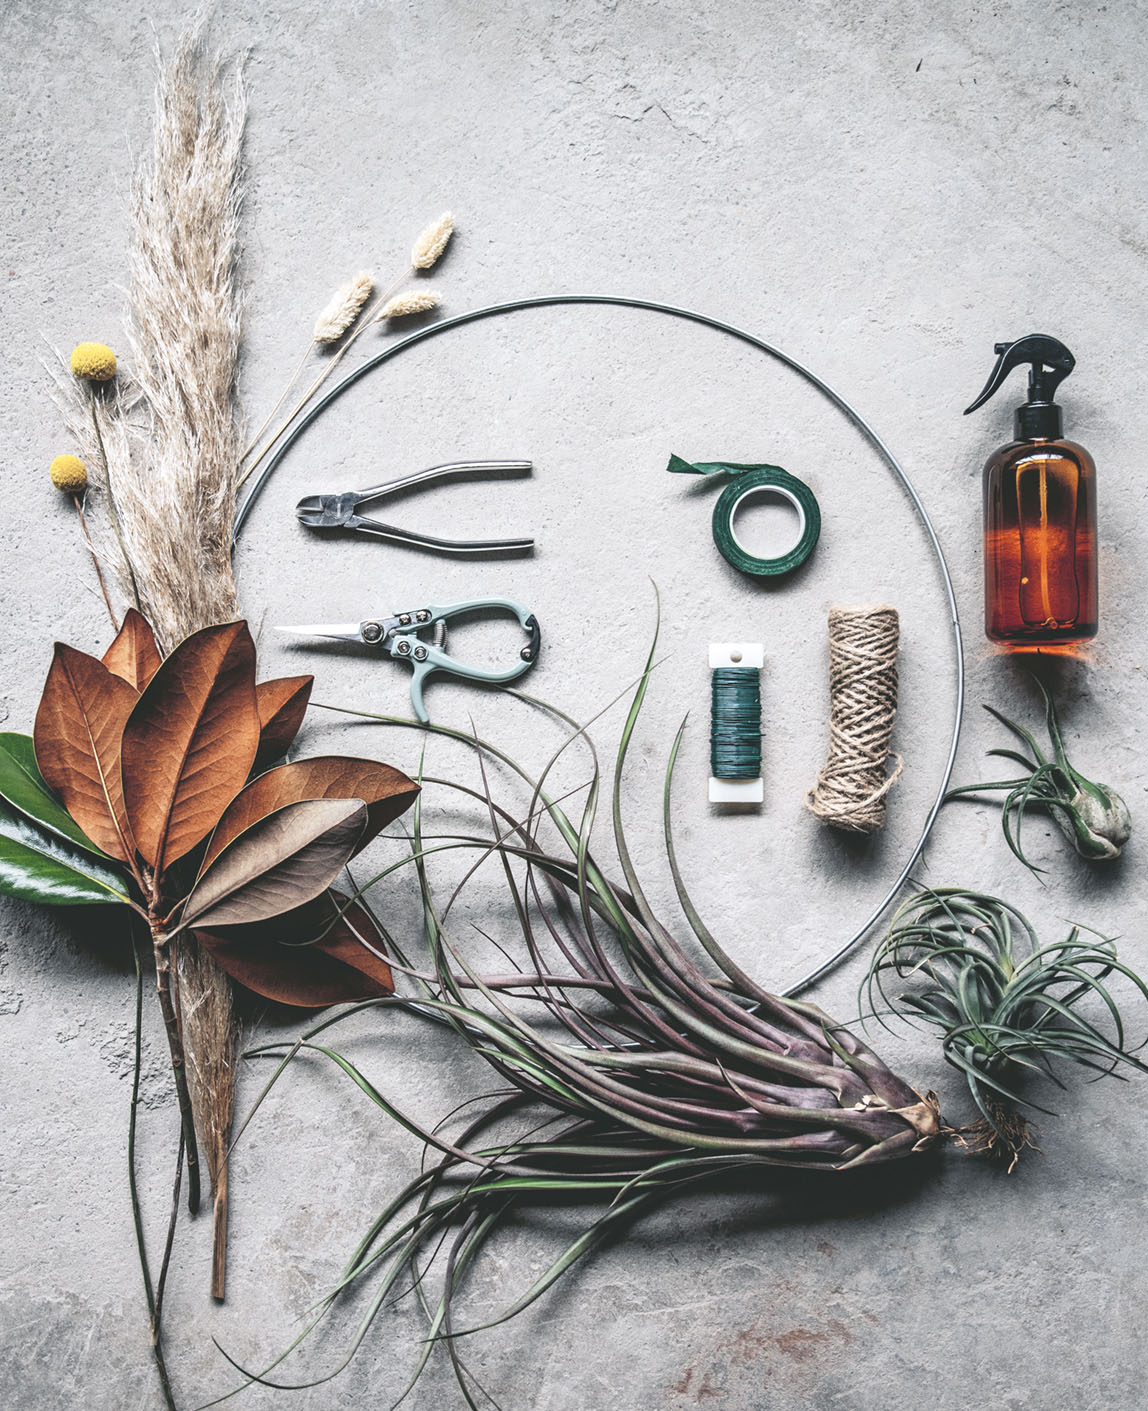
WHAT YOU’LL NEED
-
- 19in (50cm) floral hoop
- Wire cutters
- 22-gauge floral wire
- Shears
- Floral tape
- Rope
- Spray bottle
- Glue gun (optional)
- Wreath hook, nail, or command strips to hang the wreath
AIR PLANTS USED
-
- Tillandsia stricta
- Tillandsia capitata
- Tillandsia seleriana
FLORALS USED
-
- 3 Magnolia stems
- 4 dried pampas grass (Cortaderia selloana) stems
- 20 dried bunny tails (Lagurus ovatus)
- 2 dried billy balls (Craspedia glauca)
1.
Lay the hoop down on a clean surface and place your air plants and florals where you imagine them going. This will give you a good idea of how everything should be arranged and will look once complete. I know I don’t need to remind you, but be creative and have fun! I’ve decided to use a large Tillandsia stricta to be the main feature of my wreath because of how structural and bold this air plant is.

2.
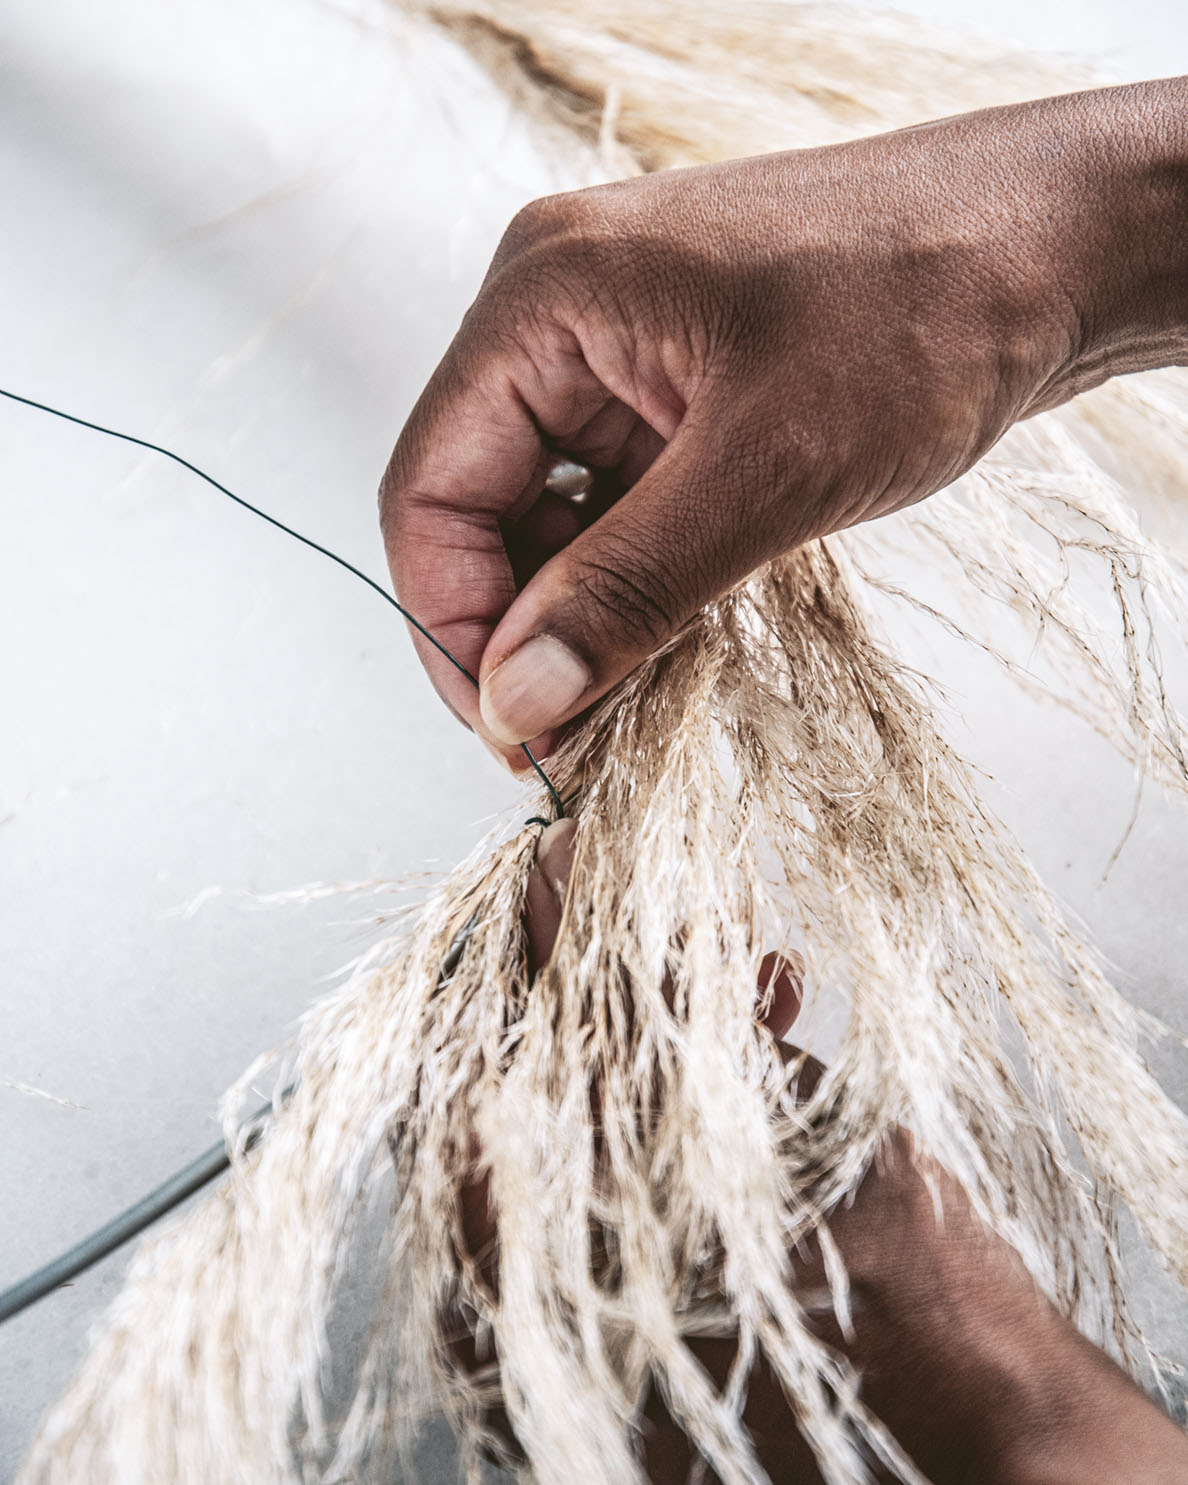
Position your first layer of florals. For this wreath, it’ll be the pampas grass because I’ll want that to be the backdrop for the entire layout. Using the wire and wire cutters, cut a 3in (7.5cm) piece of wire and tightly wrap it around the stems of the pampas grass and the floral hoop to secure them together.
3.
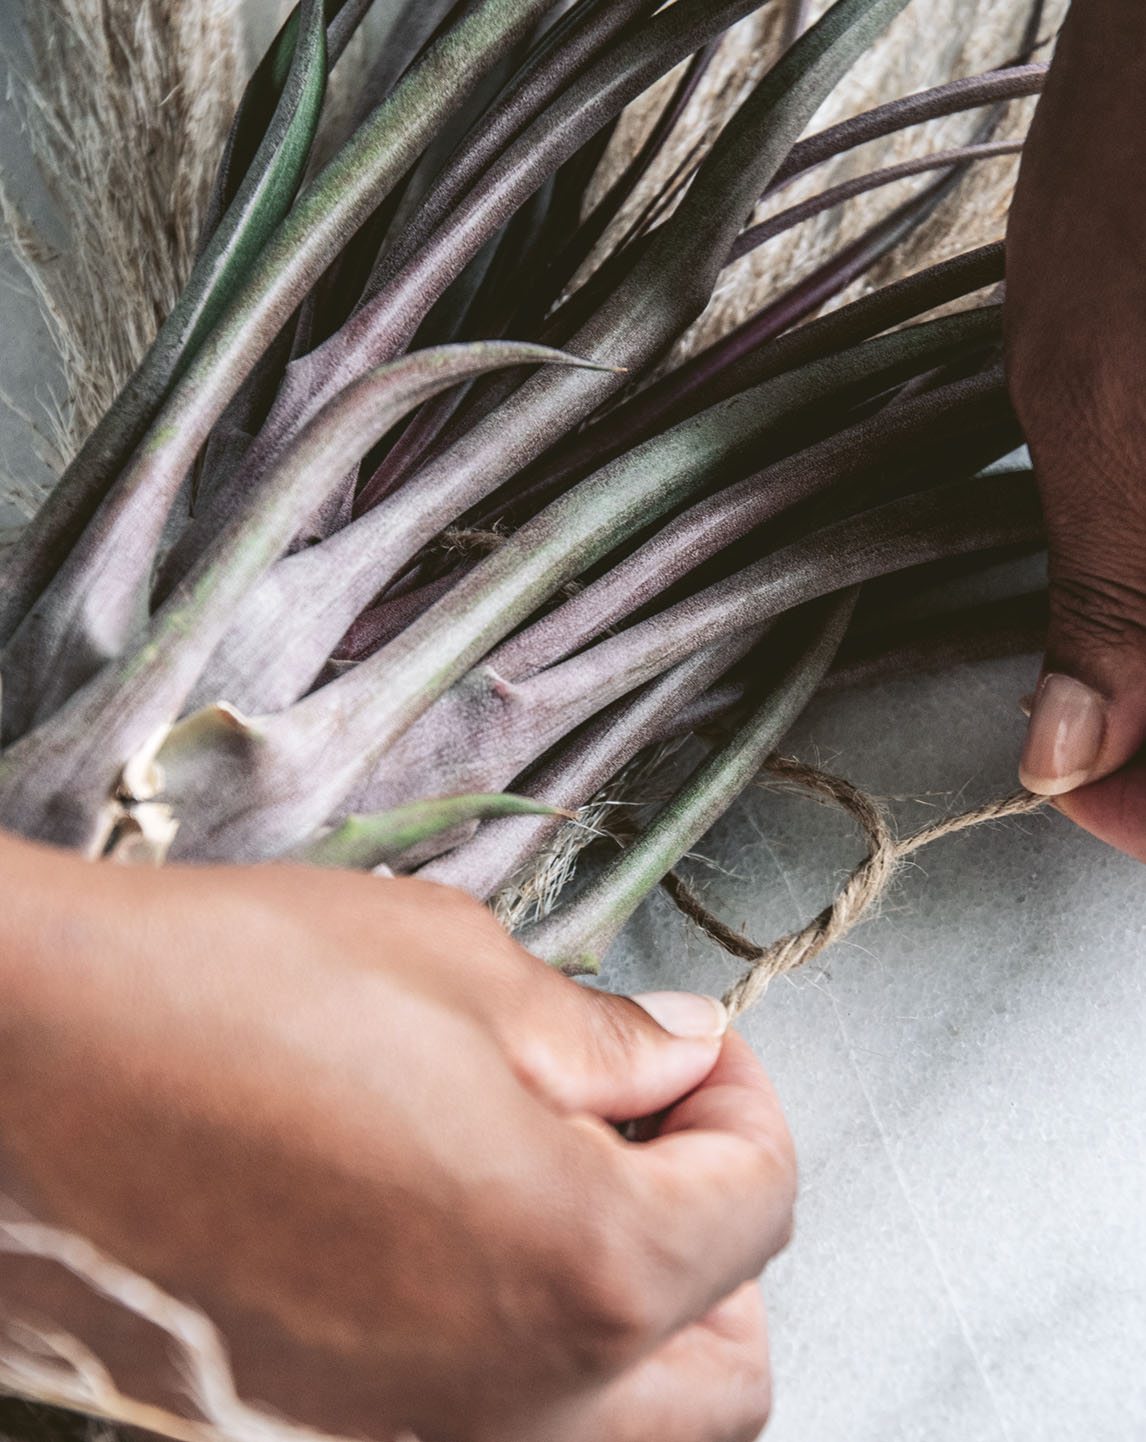
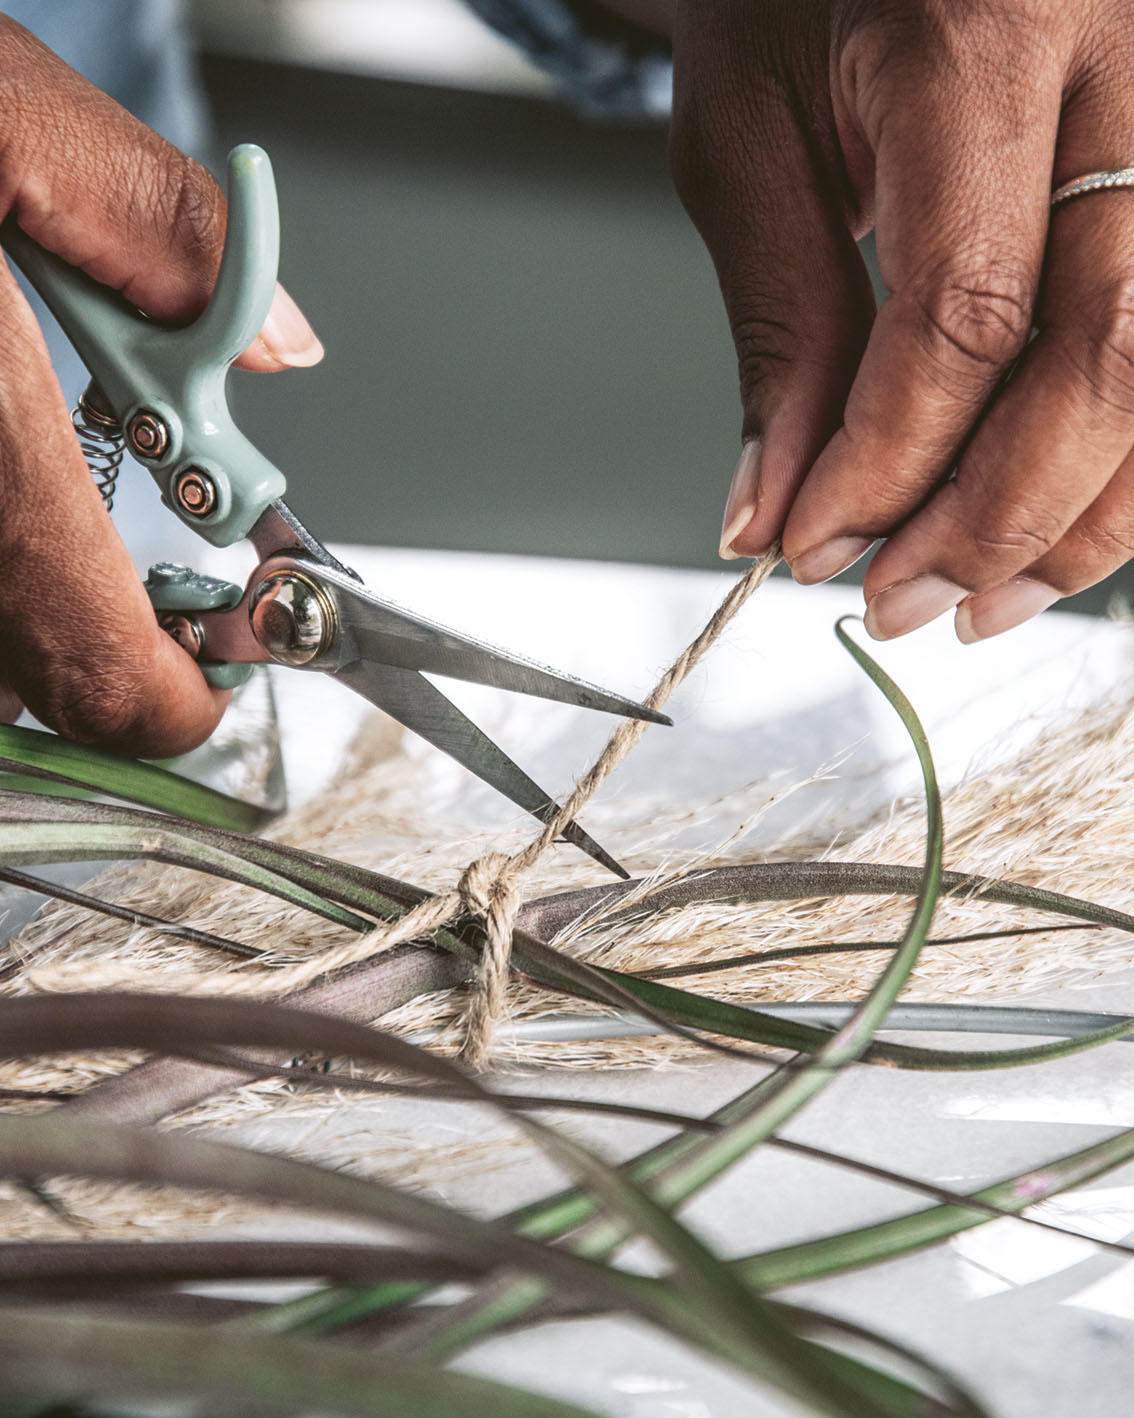
Once the pampas grass is secured to the wreath, place your main air plant at the far end of the wreath, but let a little pampas grass lead the way. Cut a 12in (30cm) piece of rope and carefully tie it around the bottom of the air plant and the hoop. Weave the rope through the outer leaves at the base of the air plant. These leaves will be drier and hold the rope better.

4.
Then cut a 6in (15cm) piece of rope and carefully weave it through the middle section of the air plant, loosely tying a loop around the last few leaves and knotting the loop. The leaves should be resting in the knotted loop, not tightly secured. Cut off any excess rope.
5.
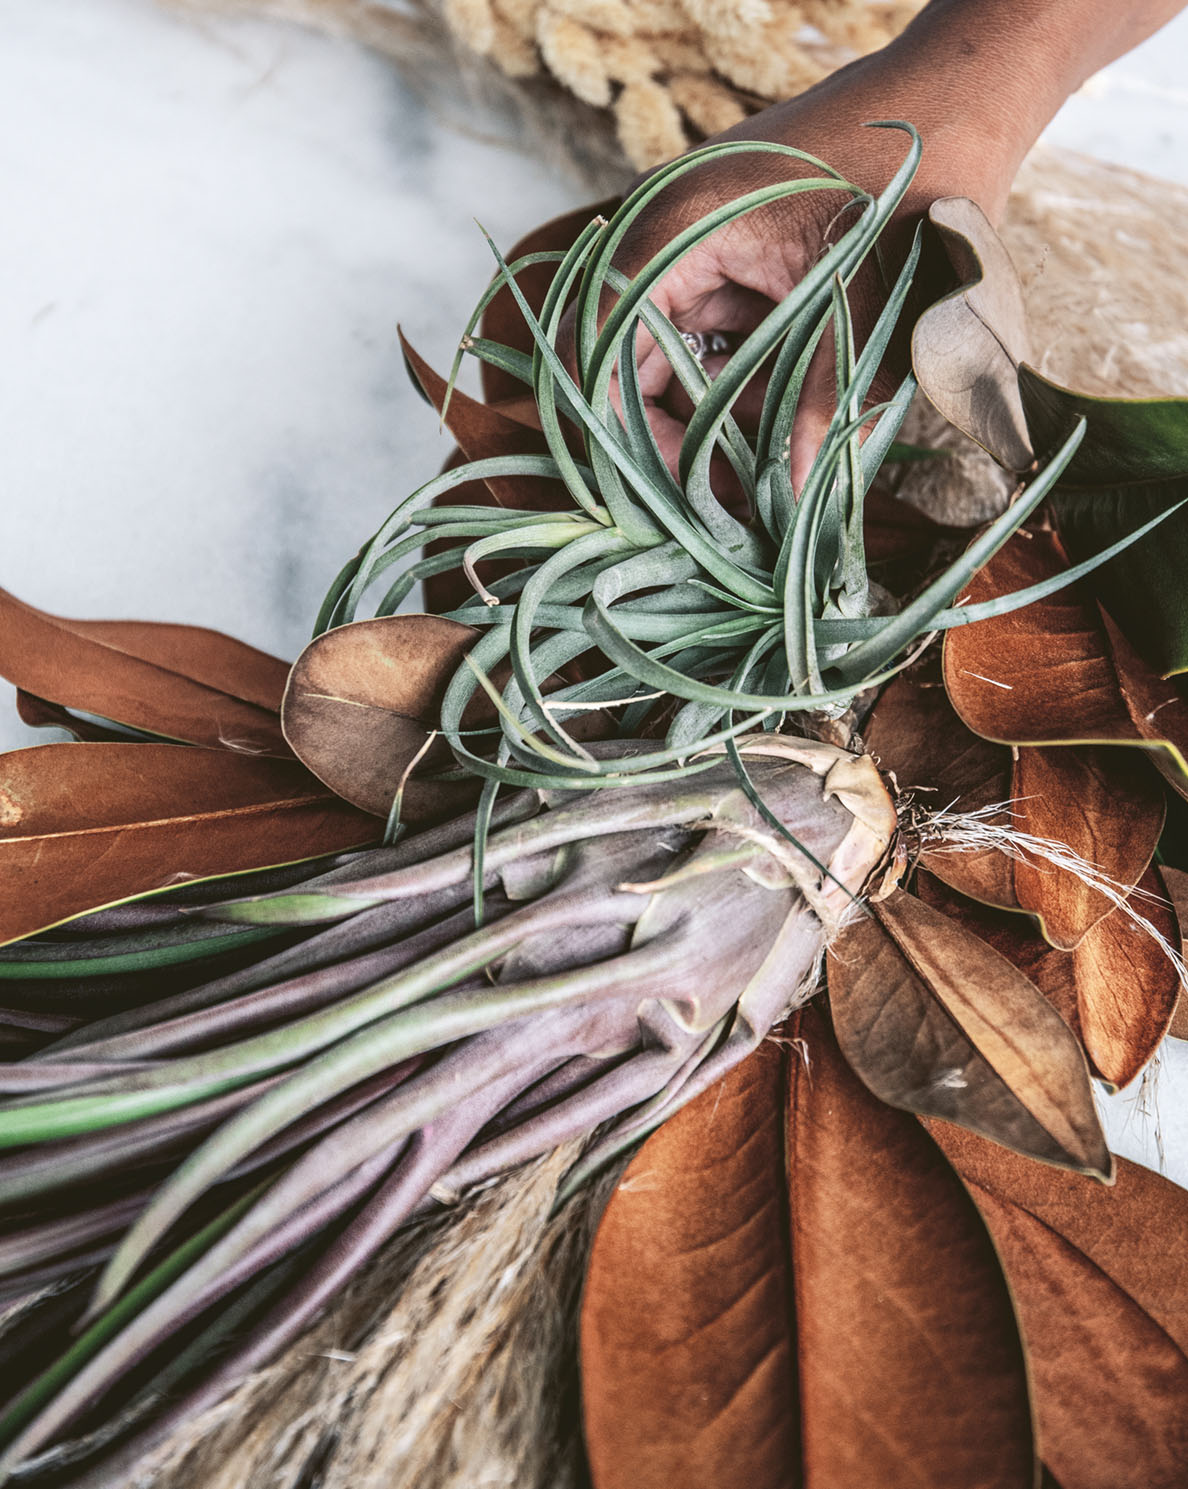
Again, using the wire and wire cutters, cut a 3in (7.5cm) piece of wire and tightly wrap it around the stems of the Magnolia and the hoop. Repeat this step with any additional Magnolia stems.
6.
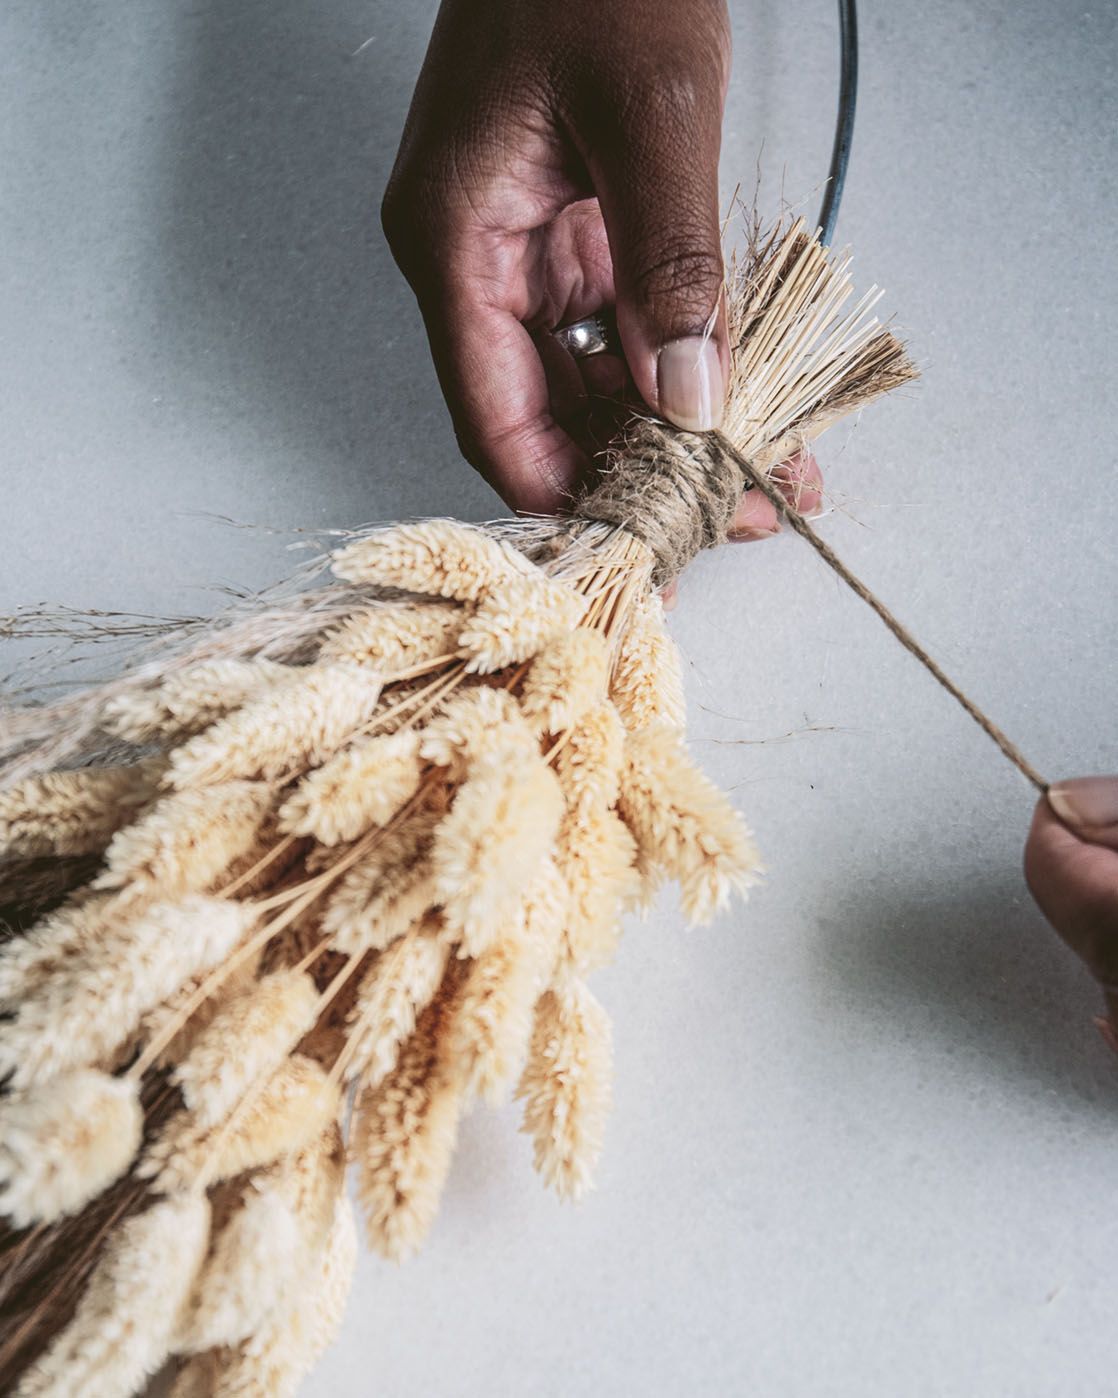
Take the bunny tails and in one hand, gather them as if making a bouquet. Make it so that the bouquet is heavier at the top and thins out at the bottom. Take the floral tape and pull off a 3in (7.5cm) piece and, while wrapping it around the stems of your bunny tails, fold and twist the tape to make it become adhesive.

6. Take the bunny tails and in one hand, gather them as if making a bouquet. Make it so that the bouquet is heavier at the top and thins out at the bottom. Take the floral tape and pull off a 3in (7.5cm) piece and, while wrapping it around the stems of your bunny tails, fold and twist the tape to make it become adhesive.
From Wild Creations: Inspiring Projects to Create Plus Plant Care Tips & Styling Ideas for Your Own Wild Interior By Hilton Carter Published by CICO Books, 2021 Photographs by Hilton Carter © CICO Books, 2021
7.
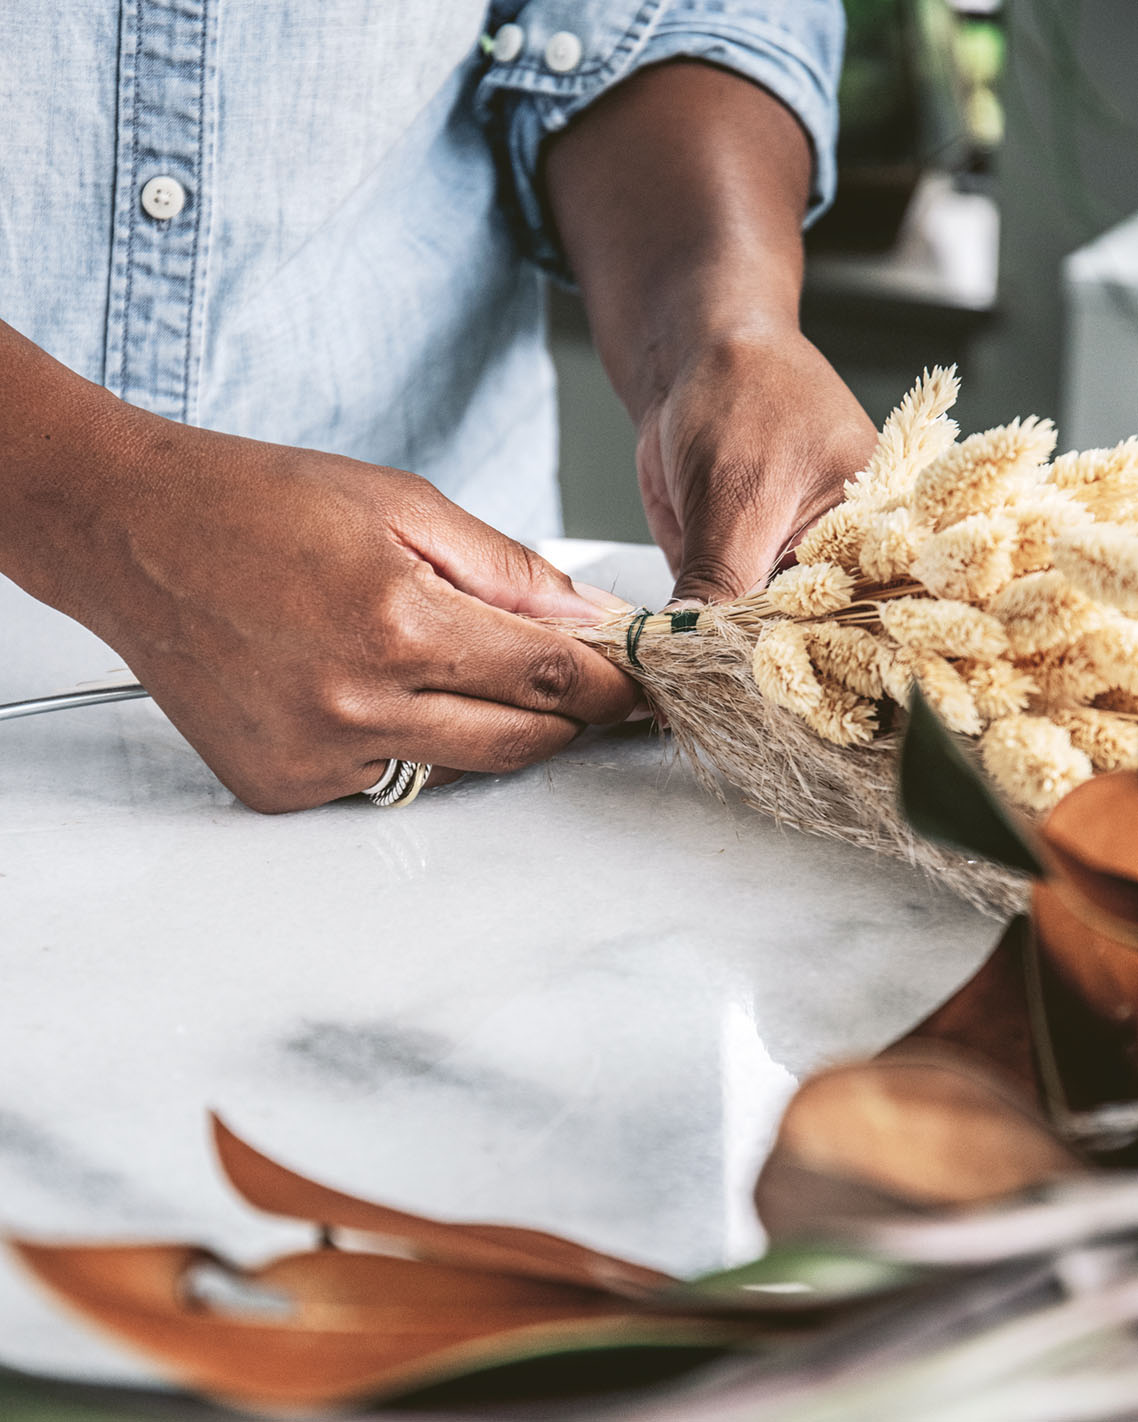
Once taped together, take the bunny tail bouquet and place it at the end of the floral design, where your pampas grass starts. Using the wire and wire cutters, cut a 3in (7.5cm) piece of wire and tightly wrap it around the stems of the bunny tails and the hoop.
8.
Cut 18in (45cm) of rope and tightly wrap that around the base of the bunny tail and pampas grass stems and your hoop. Once you get to the last bit of rope, loop it through itself to secure it. This will help give your wreath a cleaner, more finished look. Continue cleaning it up by cutting away any excess stems, wire, or rope that are sticking out.
9.
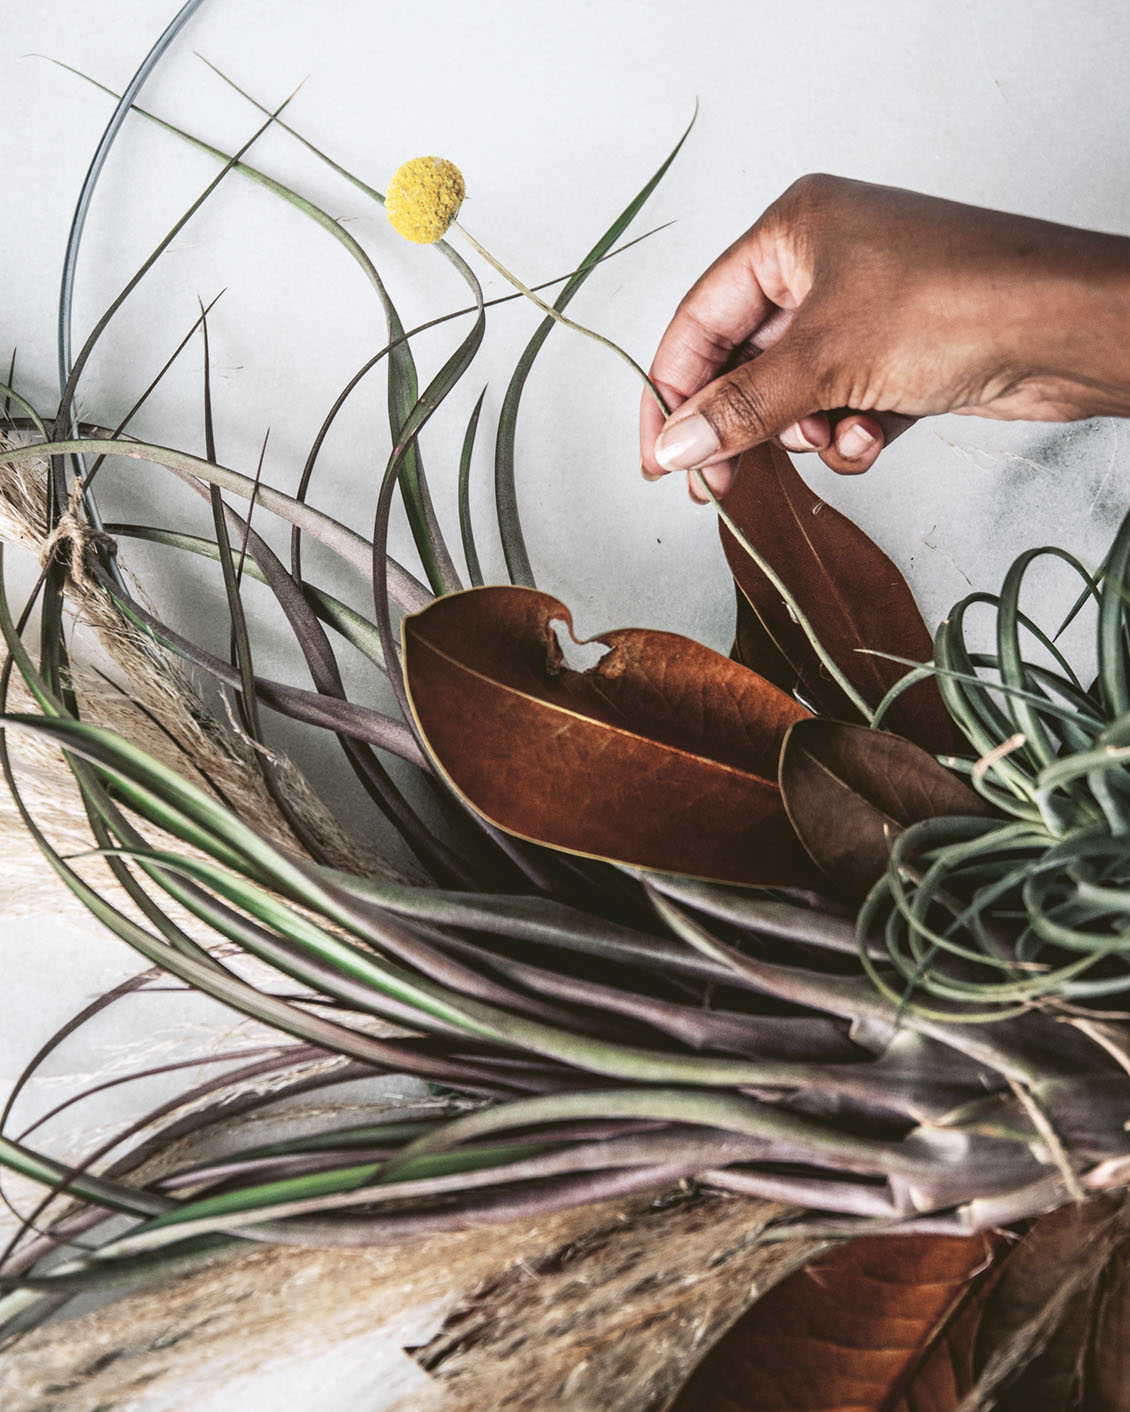
Add your final touches. For this wreath, I used two billy balls to add a pop of color. Take these stems and just work them through the other florals. You can use floral tape, wire, or even a glue gun to secure them. Your air plant wreath is complete!
10.
With the spray bottle, spray the air plants with lukewarm water so that they get the moisture they need to start with. If you’re placing the wreath outside, and you live in a dry climate, you’ll need to spray your air plants at least once a day. Securely hang from your door with a wreath hook, nail, or even Command strips. Enjoy!

Excerpted from Wild Creations: Inspiring Projects to Create Plus Plant Care Tips & Styling Ideas for Your Own Wild Interior by Hilton Carter | Published by CICO Books, 2021 | Photographs by Hilton Carter © CICO Books, 2021
For more about this author, read “Hilton Carter Is Wild About Interiors.”

